It's not uncommon for SXA indexes to not appear after installation, even if you have installed SXA separately. This is because the SXA indexes are not created by default when you install Sitecore.
To create your SOLR SXA core:
- Navigate to your Solr folder (
<path_to_solr>\server\solr) and Duplicate the core directory created forsitecore_master_index(or company_name_master_index) twice and rename it to:
• sitecore_sxa_master_index
• sitecore_sxa_web_index.
- In those two folders, remove everything except the conf directory.
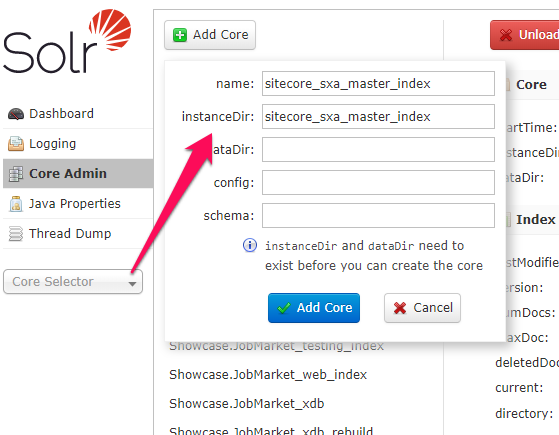
- On the Solr web interface, click Core Admin, and click Add Core to add
sitecore_sxa_master_index. Do the same forsitecore_sxa_web_index.
Make sure that the names of the Solr cores you created match the settings for sitecore_sxa_master_index and sitecore_sxa_web_index in Sitecore.XA.Foundation.Search.Solr.config. If you have to rename the cores > you have also to change the id’s in in > Sitecore.XA.Foundation.Search.Solr.config
- In Sitecore, log in to the Launchpad, and open the Control Panel.
- In the Indexing section, click Populate Solr Managed Schema.
- In the Schema Populate dialog, select
sitecore_sxa_master_indexandsitecore_sxa_web_index, and click Populate. - In the Indexing section, click
Indexing Manager. - In the Indexing Manager dialog box, select
sitecore_sxa_master_indexandsitecore_sxa_web_index, and click Rebuild.
The reason for creating the cores in SXA is to enable its functionalities to work properly. Failure to create these cores will result in exceptions being thrown when attempting to use SXA or SXA-related functionalities. Therefore, it is necessary to create the cores in order to ensure the smooth functioning of SXA.
