We have to do the Sitecore SSO integration with Azure AD and need to skip the login page. Is there any document to verify the steps?
2 Answers
Follow the below steps to integrate the Azure Active Directory(AD) with the Sitecore identity server. This will enable users login to Sitecore via organizations credentials using SSO.
Azure AD set up
- Go to the Azure Active Directory module and create a new tenant by providing the organization name and domain.
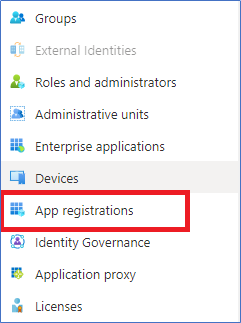
- Go to your directory and click on App registration then click on ‘New Registration’. Give this app a name and select the tenant we have created and give Sitecore identity server URL (append
/signin-oidc) in ‘Redirect URI’ field.
- Note down the Client ID and tenant ID. You’ll need these when configuring Sitecore Identity.
- Go to the manifest tab and edit “groupMembershipClaims” setting to “SecurityGroup“.
Setup Sitecore Identity
- Navigate to the identity server instance and go to this path
\sitecore\Sitecore.Plugin.IdentityProvider.AzureAd\Config. - Open
Sitecore.Plugin.IdentityProvider.AzureAd.xmlfor edit. You can change the display name. Give the values of client ID and Tenant ID which we noted down from Azure AD. Don’t forget to change Enabled to true.
- Restart the Sitecore identity server and try to login to CMS. You should see the Azure AD login option.
Mapping the AD users with Sitecore:
- Go to the Azure portal and create a new security group and add users to this group. Note down the Object ID of this group.
- Now open the Sitecore.Plugin.IdentityProvider.AzureAd.xml placed at \sitecore\Sitecore.Plugin.IdentityProvider.AzureAd\Config in Sitecore identity instance and uncomment the
AzureADUserToAdminUsernode. Paste the Azure security group ID. It will make all the security user groups members admin.
To Skip the Sitecore Login Page:
- Open this config file: Sitecore.Owin.Authentication.config file under App_Config/Include folder.
- Set as the "loginPage" attribute for any site that your Azure AD users have access to. Like in below config, I changed login Page for admin site to
$(loginPath)admin/IdentityServer/IdS4-AzureAd
    <!-- LOGIN PATH variable
             Specifies the login path prefix for federated authentication. It should be used in the "site" nodes in the "loginPage" attribute.
             The full login path must have this structure:
             $(loginPath)site_name/identity_provider
             or
             $(loginPath)site_name/identity_provider/inner_identity_provider,
             The site_name must have the "name" attribute value of the "site" node where the login path is set.
             The "identity_provider" must have the "id" attribute value of the configured identity provider that you want to use.
             The "inner_identity_provider" must be equal to the name or AuthenticationScheme of the underlying identity provider in the "identity_provider".

             Note: The "inner_identity_provider" value is sent to the "identity_provider" as an acr_value - idp:inner_identity_provider. Thus, identity_provider have to support acr_value.

             Examples:
                 <sites>
                     <site name="shell" set:loginPage="$(loginPath)shell/IdentityServer"/>
                     <site name="admin" set:loginPage="$(loginPath)admin/IdentityServer/IdS4-AzureAd"/>
                 </sites> -->
- This will skip the default login page and go straight to the Azure AD login.
You can read all the steps in detail here: https://sitecorewithraman.wordpress.com/2021/01/01/sitecore-cms-azure-ad-integration
The following steps you need to perform for Sitecore SSO integration with Azure AD:
- Configuring Azure AD: Configure your application and get the Client and Tenant ids.
- Configuring Sitecore Identity: Update some changes in the
/Sitecore/Sitecore.Plugin.IdentityProvider.AzureAd.xmlfile. Like: Enables Azure AD, enter Client and Tenant ids. - Restart your Sitecore Identity Application Service: You should now see a new Azure AD button on the login screen if you visit the Identity Server URL directly.

for more details and steps you can refer blog post: Setting Up Azure Active Directory Integration with Sitecore Identity Server


